Getting Started with OpenSolaris/Setting Up VirtualBox: Difference between revisions
(Basic Information, might as well spell it out tho.) |
No edit summary |
||
| Line 1: | Line 1: | ||
{{#css: |
|||
.header-image img { |
|||
position: absolute; |
|||
top:-10em; |
|||
right:2em; |
|||
z-index: -1; |
|||
opacity: 20%; |
|||
} |
|||
}} |
|||
'''[[Getting Started with OpenSolaris/Acquiring OpenSolaris | < Acquiring OpenSolaris]]''' | '''[[Getting Started with OpenSolaris/Installing OpenSolaris | Installing OpenSolaris >]]''' |
'''[[Getting Started with OpenSolaris/Acquiring OpenSolaris | < Acquiring OpenSolaris]]''' | '''[[Getting Started with OpenSolaris/Installing OpenSolaris | Installing OpenSolaris >]]''' |
||
<div class="header-image"> |
|||
[[File:OpenSolaris monogram.png|300px]] |
|||
</div> |
|||
In order to run OpenSolaris in a virtualised environment, we'll be using [https://www.virtualbox.org/ VirtualBox]. In order to do that, you'll need to download it. |
In order to run OpenSolaris in a virtualised environment, we'll be using [https://www.virtualbox.org/ VirtualBox]. In order to do that, you'll need to download it. |
||
Latest revision as of 15:14, 5 February 2024
< Acquiring OpenSolaris | Installing OpenSolaris >
In order to run OpenSolaris in a virtualised environment, we'll be using VirtualBox. In order to do that, you'll need to download it.
Downloading VirtualBox
As part of this guide I will using VirtualBox v6.1.50. As of the time of writing however, there are newer v7 series builds available. While the guide will function for those newer versions, certain screens and options may look or worded differently. If you are in linux or unix, please grab VirtualBox from your package manager. If you are Mac OS X or Windows however, download either the latest installer, or v6.1.50. Please be aware that this older version is no longer supported by Oracle. Installation should be fairly simple on all platforms.
Setting up a Virtual Machine

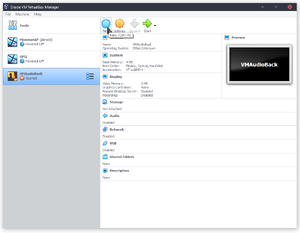
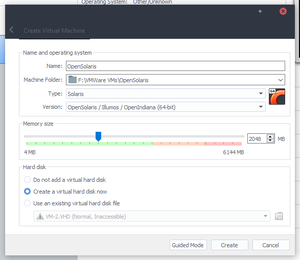
Once VirtualBox has been installed, go ahead and open it, and we'll setup a virtual machine for use with OpenSolaris. In the VirtualBox Manager, click "New" or press ctrl-n to open the new VM wizard. In addition, click "Expert Mode" at the bottom.

- Give your VM a name (OpenSolaris is fine)
- Select a location with at least 20GB of free storage available.
- Give the VM a good 2GB of RAM, however 1GB is good enough, and more is fine.
- And finally, select "Create a Virtual hard disk now"
Click "create".
Creating a Virtual Hard Disk
After "create" is pressed, a new dialogue opens. In this:
- Change the file size to 10-15GB, more can be added depending the storage you have available. (OpenSolaris does not support a system partition larger than 2TB)
- You can change the Image Type, however the default "VDI" format, can be converted if needed.
Again, click create.
Adjusting Settings
Once your new VM is created, click "Settings" or press ctrl-s to open the settings dialogue. Not much needs to changed in here.
- In Display, change the Video Memory to a higher amount, either 64, or 128MB. You may also wish to enable 3D Acceleration.
- In Storage, mount the OpenSolaris LiveCD image you downloaded to Virtual Disc Drive under "SATA".
Click OK.
