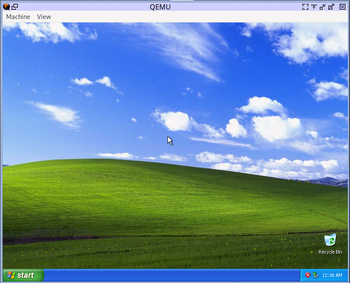
How to install Windows XP in QEMU
< Windows 2000 | Windows Vista >

This page details how to install Windows XP in QEMU. Windows XP is an operating system created by Microsoft, first released on August 24, 2001. It had several service packs and dozens of different variations. Support ended on April 8, 2014 for the regular version and April 9, 2019 for POSReady 2009.
While this guide will work for every version and service pack, we will be using and strongly recommend using Windows XP Professional Service Pack 3, since it has the greatest application support.
Prerequisites
QEMU
You'll need QEMU installed.
Windows XP ISO
You'll need a Windows XP ISO for this guide. You can:
- You can use a physical disc
- Download the Stock XP ISO from Computernewb (32-bit/64-bit)
- Download an updated SP3 ISO with most updates slipstreamed (32-bit) from Computernewb
- Source an ISO from elsewhere
Starting up
Installation
First, open a command window and create a disk image for the VM using a command like the following.
qemu-img create -f qcow2 winxp.img 12G
12G can be replaced with however big you want the hard drive to be (with G standing for Gigabytes). Since Windows XP is an older OS, it doesn't take up a lot of space. If you're planning to install a lot of applications and games, 30G should be decent enough.
When that's done, start up QEMU with a command like the following:
If your ISO is 32-bit:
qemu-system-i386 -m 512M -hda winxp.img -device VGA,vgamem_mb=64 -cpu host -accel kvm -M pc -netdev user,id=lan -device rtl8139,netdev=lan -usb -device usb-tablet -rtc base=localtime -monitor stdio
If your ISO is 64-bit:
qemu-system-x86_64 -m 2G -hda winxp.img -device VGA,vgamem_mb=64 -cpu host -accel kvm -M pc -netdev user,id=lan -device rtl8139,netdev=lan -usb -device usb-tablet -rtc base=localtime -monitor stdio
This adds a VGA card (with 64 MB of VRAM, to allow high resolutions and color depth), KVM acceleration (allowing the OS to run at native speeds), an RTL8139 internet adapter, and a USB tablet for smooth mouse input.
We set the memory to 512 MB for 32-bit, and 2 GB for 64-bit, but it can technically run on as low as 96 MB of RAM. 32-bit versions of XP (as well as all 32-bit OSes) can't recognize more than 4 GB, so if you have a 64-bit system we recommend using 64-bit XP. (There is a PAE patch that also removes this limitation, but programs can't use more than 4 GB regardless.)
If you use Integral Edition, you can get better performance by switching -M pc with -M pc-q35-2.6.
From here, the installation is pretty straightforward. Agree to the license, (quick) format the disk, and wait for it to install. The OS should install pretty quick on newer systems.
Installing Supermium and MyPal
It is highly recommended to install Supermium or MyPal, which are modern browsers for Windows XP. Supermium is based on Chromium 122, while MyPal is based on Firefox 68. Supermium is recommended for beefy systems, while older systems or systems with lower RAM should use MyPal.
Supermium
Supermium needs at least XP SP1, SS3, and around 2 GB of RAM to function properly.
- Open Internet Explorer (or whatever browser you have installed)
- Navigate to
http://win32subsystem.live/supermium/legacy/ - Download the Setup executable for your VM's bit width and run it
- You will get a few options in the setup. All of them are optional but I recommend installing the Noto Emoji font and creating shortcuts for Supermium. Hit OK
- If all went well, Supermium should be working!
MyPal
- Download the MyPal ISO from Computernewb (32-bit/64-bit) or download the zip directly from GitHub (32-bit/64-bit)
- Switch to the MyPal ISO by running a command similar to the following in the QEMU console:
change ide1-cd0 /path/to/mypal68.iso
- Open the CD and extract the ZIP file anywhere
- Navigate to the MyPal folder and open mypal.exe
- If all went well, it should be running now!
Activation
Have a copy of XP SP2 or SP3 that isn't activated? Here's how to fix that:
- Download the XP telephone keygen from Computernewb
- Click Start -> Activate Windows
- Check "Yes, I want to telephone a customer service representative to activate Windows" and click Next
- Open the keygen
- Click the "Get from the system" button, if that doesn't work, type the installation ID manually into the program (you'll see it in step 3, its a long string of numbers)
- Type the numbers you get in the the keygen's "Confirmation ID" into their respective columns in the activation program
- Click "Next"
- Windows should be activated!