How to format a Flash Drive bigger than 32GB as FAT32
On Windows, the built-in tool for formatting doesn't allow you to format a Flash Drive as bigger than 32GB as the FAT32 file system, even though FAT32 will work fine. Although its not recommended to use FAT32 for standard use (since you can't use files over 4GB in size) you'll still need to use it if you're installing something like a Linux distribution through your flash drive.
This page will guide you on how to format a Flash Drive bigger than 32GB as FAT32.
With FAT32 Format
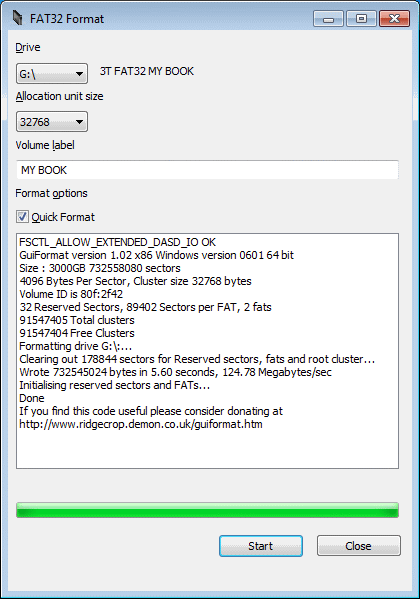
Using a program called FAT32 Format it is extremely easy to format a flash drive. Go to the site, click on the picture (or just click here and open the EXE when its done. You'll see a screen like this:
MAKE ABSOLUTE SURE THAT IT IS THE RIGHT DRIVE SELECTED, IF YOU FORMAT THE WRONG DRIVE YOU WILL LOSE ALL DATA. (Although you can recover it with Recuva, but its a pain).
When you're sure you got the right drive selected, hit "Start". An important note: Close all Explorer windows with the drive open, or it will say it is in use and won't format it.
With PowerShell/CMD
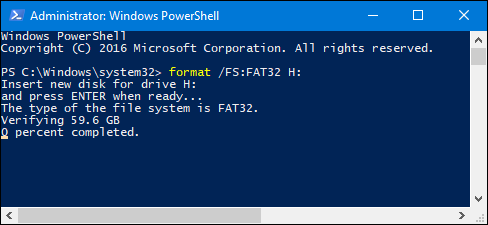
It is also possible to do this with PowerShell/CMD. If you can't download the file for some reason this is another option. To use PowerShell, do the following:
- Right click on the Windows Logo in your taskbar and click "Windows PowerShell (Admin)". (If you're on Vista/7, type Windows PowerShell or Command Prompt and right click and run as Admin). Then, type the following command in:
format /FS:FAT32 X:
Replace X: with the drive letter you want to format and hit Enter. Note, on large drives it may take up to an hour to completely format.

