QEMU/Guests/Windows NT 3.x-4.0 (MIPS): Difference between revisions
m (still haven't bothered uploading my build of emacs, apparently mini vmac compiles fine with VC 4.0 & 4.0 SDK so i am going to try that later) |
m (Elijahr241 moved page How to install Windows NT on MIPS in QEMU to QEMU/Guests/Windows NT 3.x-4.0 (MIPS)) |
Revision as of 19:29, 20 June 2022
< Windows NT 4.0 | Windows 2000 >

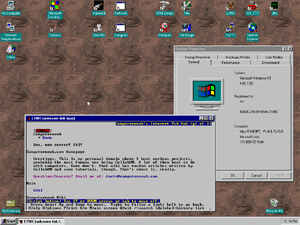
Windows NT 4, along with Windows NT 3.51 and 3.5 can successfully run and install in QEMU's MIPS emulation. Windows NT 3.1 BSODs on setup, so it is not installable. Service Pack 1 was the last supported service pack on MIPS Windows NT 4. Currently, PowerPC and Alpha ports of Windows NT 3.x & 4 do not run in QEMU.
While these instructions are for NT 4, they will also work the same for NT 3.51 and NT 3.5
Notes
While it is very cool to see and play with a non x86 Windows environment, it's not very usable - programs made for x86 Windows NT do not run without wx86, and there were virtually no commercial products made for Windows NT 4 MIPS. So, it is really more of a curiosity than a usable OS.
There are no USB 1.1 drivers for Windows NT 4 MIPS, so proper mouse alignment is impossible, but is not a big deal. The bigger deal comes from the insane memory leaks that QEMU MIPS has when formatting the system partition. This memory leak is actually enough to bring a server with even 64 GB of RAM down to its knees in a matter of seconds. Once you are booted into the OS, the memory leaks are no longer present. (UPDATE: This was fixed in QEMU 2.9.0. If you want to use this, use QEMU 2.9.0 or above.)
Starting up
First, download the following file and extract it somewhere: http://web.archive.org/web/20150809205748/http://hpoussineau.free.fr/qemu/firmware/magnum-4000/setup.zip
One of the files will be called NTPROM.RAW. Rename this to mipsel_bios.bin.
Now we're going to make a hard drive. The maximum size you can make it is 2 gigabytes, so we create the disk like this:
qemu-img create -f qcow2 ntmips.img 2G
Next, we start QEMU with the following arguments. Take note to not set the memory above 128 or 64 MB, because the Magnum machine can't run more than 128 MB of RAM.
qemu-system-mips64el -hda ntmips.img -M magnum -nic user,model=dp83932 -cdrom win_nt_4_iso.iso -m 128 -global ds1225y.filename=nvram -global ds1225y.size=8200
A break down of this command: qemu-system-mips64el is the name of the QEMU emulator, obviously. -hda ntmips.img tells the emulator to use the hard drive we just created. -M magnum tells QEMU to emulate the Magnum machine. There are multiple MIPS machines emulated by QEMU, you can type -M ? for a full list. -nic user,model=dp83932 adds a virtual NIC (in this case, the 10 mb/s SONIC DP83932 network NIC). If you don't want internet you can remove this flag. -cdrom win_nt_4_iso.iso inserts a Windows NT 4 into the emulated cd-rom. If you have a physical copy of NT 4 you could change it to i.e. -cdrom /dev/sr0. -m 128 sets the memory, in this case, 128 MB. And finally, -global ds1225y.filename=nvram -global ds1225y.size=8200 adds a persistent nvram which is vital for saving the system state.
Now that all that's done, let's get the OS installed.
Installation
When you start the machine a problem you'll likely notice is that the date is set to the year 2033. The clock also might be set to "8:85:00", or something similar.
This is a "bug" in the emulation that can be really easily fixed. There are two ways to fix it. The first is to add something like -rtc "base=1995-07-08T11:12:13,clock=vm" to the QEMU command line. The second is to go to "Initialize system", "Set time", and then set the proper date. An important note: If you don't properly set the clock, Windows NT will set the date to January 1, 1601 at 5:00 PM.
Now we'll set the environment variables. Choose the following variables:
- Select monitor resolution: 1024x768 or 1280x1024
- Select floppy size: 3.5 1.44 M
- Is there a second floppy: No
- Enter SCSI Host ID (0 - 7): 7
Next, set the default environment to "Scsi hard disk".
Check the ethernet address if you want internet. Return to main menu.
Hit "Exit".
Now when it restarts, hit "Run a Program".
Type the following in: cd:\mips\arcinst
This sets up our system partition and sets up the boot loader. THIS is where the memory leak happens (on QEMU 2.8 and below), but you really don't need anything big for this, just make a 5 MB partition to get it done as fast as possible.
When we're done with that, exit and run the following: cd:\mips\setupldr
From then on, it installs pretty much exactly like x86 NT. Make sure you skip the disk scan, go through the setup, and congratulations, you'll have a working NT MIPS environment!
Software
Windows NT 4 MIPS, surprisingly, has quite a bit of software ported over to it. Below are links to ported softwares and original software designed for the system.
| Browsers | Editors | Userlands | Clients | Games | Misc |
|---|---|---|---|---|---|
| Lynx | Metapad | Yori | 0irc | Hyperoid | WinImage |
| Internet Explorer 3.01 | Vim | C shell (demo) | PuTTY | Quake1 | Psych |
| vi | QuakeWorld | wx86 | |||
| mep | Neko98 | Resource Kit | |||
| Dungeon | unzip | ||||
| NetHack | aclock | ||||
| gzip | |||||
| tar | |||||
| Dependency Walker |
Some of the download links don't work, you'll need to right click the link and click "Save link as..."
This is due to a recent change in policy in browsers such as Chrome regarding HTTP links