QEMU/Guests/Windows NT 4.0: Difference between revisions
mNo edit summary |
|||
| Line 39: | Line 39: | ||
The following is an simple guide on how to install it: |
The following is an simple guide on how to install it: |
||
# Download [http://bearwindows.zcm.com.au/vbempj.zip vbempj.zip] and extract it to it's own folder. |
|||
# On the desktop, right click and click Properties then navigate to the Settings tab. |
|||
# Click the "Display Type.." button, then click Change button then the "Have Disk..." button. |
|||
# Hit Browse button then select the vbemp4.inf file from the <code><vbempj folder>\VBE20\NT4\</code> directory. |
|||
# Select VBE Miniport - Standard PCI Graphics Adapter (VGA). |
|||
# Reboot |
|||
[[Category:Windows installation guides]] |
[[Category:Windows installation guides]] |
||
Revision as of 07:42, 11 October 2024
< Windows Me | Windows 2000 > | Windows NT MIPS

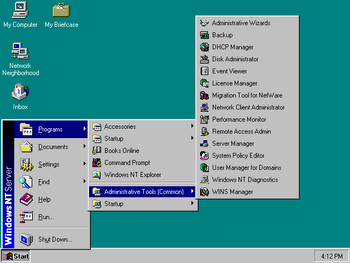
This page details how to install Windows NT 4.0 in QEMU. Windows NT 4.0 is an operating system created by Microsoft, released on July 31, 1996. Support ended in July 2006 for the Embedded version.
This article is for the x86 release of NT 4.0. There is also a MIPS version of Windows NT which runs in QEMU.
Prerequisites
QEMU
You'll need QEMU installed.
Windows NT 4.0 ISO
You'll need a Windows NT 4.0 ISO for this guide. You can use a physical disc or download the Workstation ISO from here.
Starting up
Installation
Open a command window and create a disk image for NT 4 like so:
qemu-img create -f qcow2 winnt4.img 1G
1G can be replaced with however big you want the hard drive to be (with G standing for Gigabytes). There is an annoying quirk with the NT 4 setup where it won't let you format drives bigger than 4 GB due to a limitation in the setup. You'll need to partition the drives using something like gparted if you want more space.
When that's done, run the following command:
qemu-system-i386 -hda winnt4.img -cdrom winnt4_iso_name.iso -device VGA -cpu pentium3 -m 128 -M pc,hpet=off -netdev user,id=lan -device pcnet,netdev=lan -rtc base=localtime -monitor stdio
The CPU is set to pentium3 here to prevent a bug that occurs in the NT 4 setup on newer CPUs which causes a BSOD.
We set the memory to 128 MB of RAM, but NT 4 can run on as little as 16 MB of RAM, but that's unrecommended if you want to be running any programs.
The installation is pretty self explanatory. In the setup, skip creating an emergency repair disk, and choose the defaults for the Ethernet adapter. Say yes to using DHCP.
During the setup it will ask you to set your Display Properties, which requires a "test". This test is buggy on QEMU, and locks the OS up on some systems. Just hit OK and stick with 16 colors/640x480 for now.
At this point, if all went well, there'll be an option to restart the PC. Windows will reboot and you should be taken to the login screen. To login, go to the QEMU console and type sendkey ctrl-alt-delete. The username will be "Administrator" followed by whatever password you set during the setup (if any.)
VBEMP Installation Guide
In order to have more than the standard IBM VGA mode of 640x480 16 colors, you have to use the VBEMP driver in order to get access to higher resolutions and color depths.
The following is an simple guide on how to install it:
- Download vbempj.zip and extract it to it's own folder.
- On the desktop, right click and click Properties then navigate to the Settings tab.
- Click the "Display Type.." button, then click Change button then the "Have Disk..." button.
- Hit Browse button then select the vbemp4.inf file from the
<vbempj folder>\VBE20\NT4\directory. - Select VBE Miniport - Standard PCI Graphics Adapter (VGA).
- Reboot