VM7: Difference between revisions
mNo edit summary |
|||
| Line 20: | Line 20: | ||
* DragonFlyBSD |
* DragonFlyBSD |
||
* NetBSD |
* NetBSD |
||
* GhostBSD - |
* GhostBSD - utouch-kmod is required for absolute mouse input. |
||
* OmniTribblix |
* OmniTribblix |
||
* OpenIndiana |
* OpenIndiana |
||
Revision as of 19:41, 3 August 2022
VM7 is a VM that debuted in December 2021. The VM allows any user to install any OS they want, either through Lily or Dartz's ISO folder or from a website using !httpcd (url). A list of them can be found at http://computernewb.com/~dartz/isos and http://computernewb.com/~lily/ISOs.
There is also an alternate version of VM7 for older operating systems you can use, called VM8. You can view the article for it here.
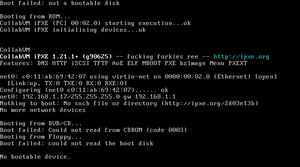
Users interact with the VM through a bot named AnyOSInstallBot. Another way users can interact with the VM is the default iPXE which is named "CollabVM iPXE", a custom version of iPXE. This iPXE version behaves similar to vanilla iPXE, VM8 does not have this however.

OS Compatibility Reference Sheet for VM7
OSes confirmed to work on VM7
- Windows 2000 to 11 - Older than 2000 works but no networking
- Any GNU/Linux distribution with VirtIO modules built in
- Any Windows 2000 to 11 bootleg from Crustywindows
- OpenBSD
- DragonFlyBSD
- NetBSD
- GhostBSD - utouch-kmod is required for absolute mouse input.
- OmniTribblix
- OpenIndiana
- 9front
OSes that do not work on VM7
Doesn't work at all
- FreeBSD - 64-bit panicks due to something with APIC and 32-bit gets stuck on "Timecounters tick every 10.000 msec"
Facts about VM7
- Due to the high requirements of Windows 11, attempting to insert the ISO will insert "Windows 7 Haunted Edition" instead.
- AnyOSInstallBot may not be present sometimes due to it being offline or an admin kicking it (Possibly due to abuse of the bot)
- Forkies usually come on VM7 to eject the CD through AnyOSInstallBot or type !reboot in the middle of an install or when you are using the system. (They mostly change the CD in the middle of an install)
- Another retard thought AnyOSInstallBot was a shell script, and tried to execute a script to delete the user directory but failed horribly.
- An extremely common occurrence on VM8: People tend to try and install 64-bit OSes on Install Any OS (OLD OSES), which is 32-bit. It always seems like they read "older OSes" and think "It's just a clone of VM7" and try to insert his Pissta or Server 2008 CD into it.
- Most people that come on here don't know how to use part of the
boot.netboot.xyzmenu. They choose Windows, load the installer from nothing (boot with no base URL) (Keep in mind, that choosing Windows expects you to load WIMs from a remote source), leave the base URL blank when they are PROMPTED to put something there, load it again, leave the base url blank, try changing the architecture, and repeat.
Tips for both VM7 and VM8
- You are better off using this VM when no one is there (Join at like 1:00 AM EST), because I guarantee you one faggot is gonna come, insert his Pissta or Server 2008 (or maybe CHOCOLMOS) CD and install that over whatever you are installing.
- People enjoy installing operating systems that are already their own VMs. Instead of doing that, try installing some really obscure OS or a bootleg from Crustywindows.
- If you want to install Windows 7 on VM7, Consider doing !lilycd WinCHOC.iso, it's literally a CHOCOLATEMAN themed version of Windows. Make sure to select Ultimate during setup.
- If you don't want to wait so long for
!reboot, you can alternatively open the webapp OSK and soft reboot the virtual machine by pressing Ctrl+Alt+Delete.
- When booting, go to iPXE command line and type in
exit, this way you don't have to wait for iPXE to tell you that there is no network devices then let you boot to CD or floppy.
- The best bootset order is
nad. Why? Not because that's a word for testicles, but because by using the sanboot command in iPXE, you can still boot to the hard drive by typing insanboot -d 0x80.
Gallery
-
People installing a post-reset Vista build (and failing, as you can see)
-
Windows CHOCOLATEMAN Edition running on VM7
-
VM8 when restored from the snapshot. Notice how it does not have "CollabVM iPXE"
-
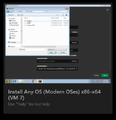
People installing Windows XP Professional on VM8


